Splitting Floors
Once every scan is aligned and saved, split the model into floors. Each floor becomes its own entry on the project’s Floors tab.
Detect floors
Section titled “Detect floors”-
On the alignment screen, tap Split into Floors in the footer.
-
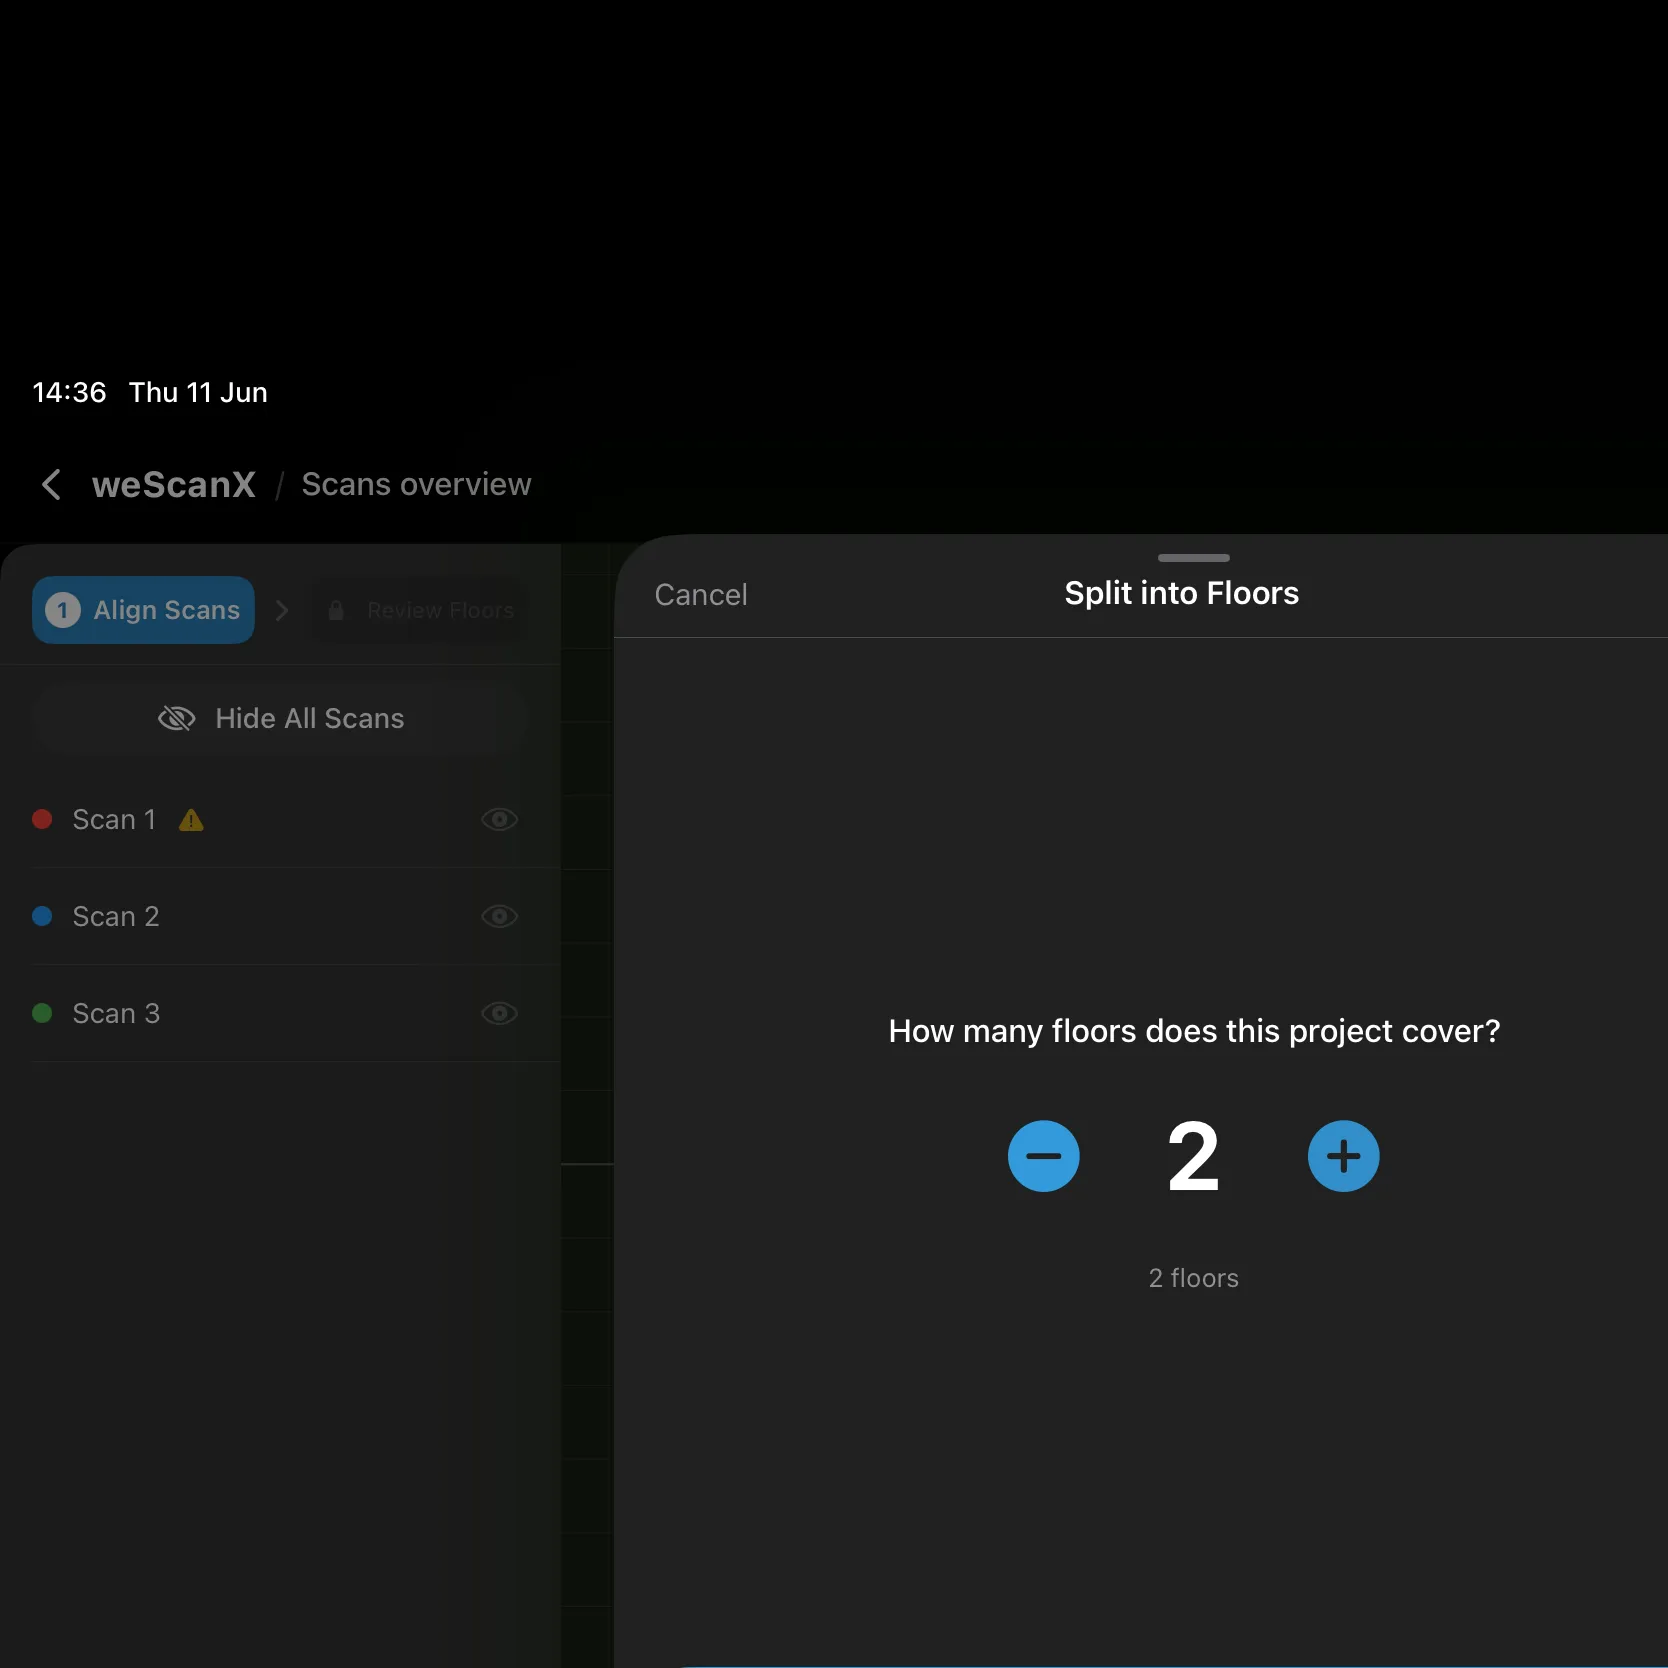
The sheet asks: “How many floors does this project cover?” — set the floor count with the stepper.
-
Tap Detect. The app analyzes the point cloud and proposes a level range for each floor.
Review and save
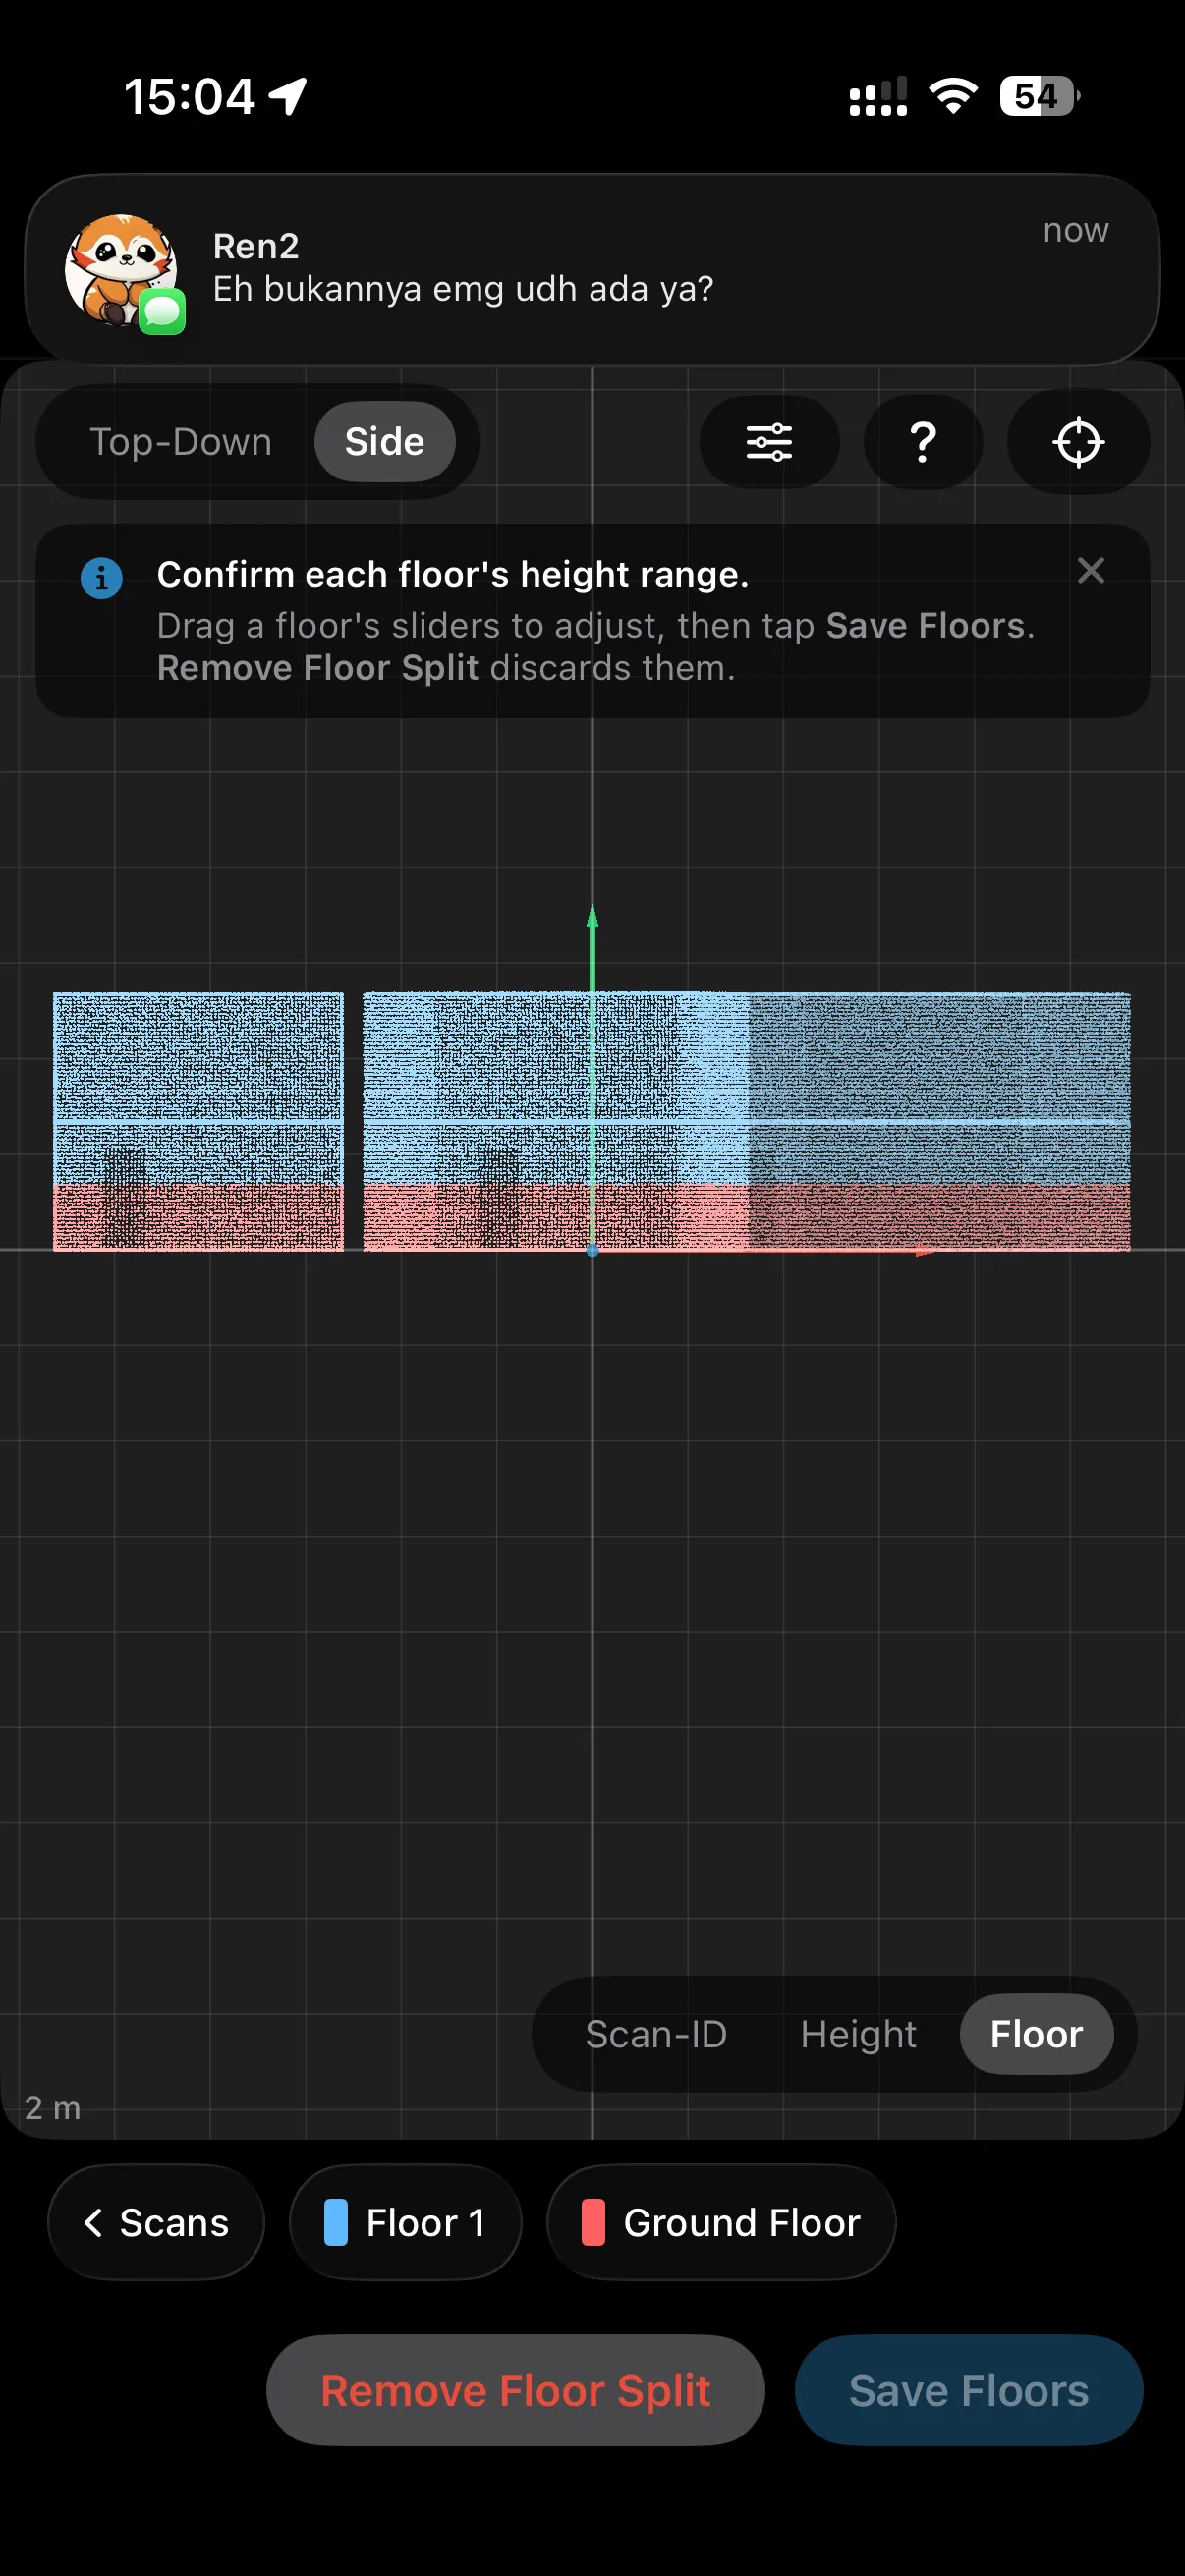
Section titled “Review and save”The hint reads: “Confirm each floor’s height range.” — check each floor’s range from the Side view.
The sidebar switches to the Review Floors step and lists each detected floor with its range (for example “0.0 m → 2.7 m”). Expand a floor to adjust its Upper and Lower bounds with sliders — two boundary lines on the 3D view show where the floor starts and ends.
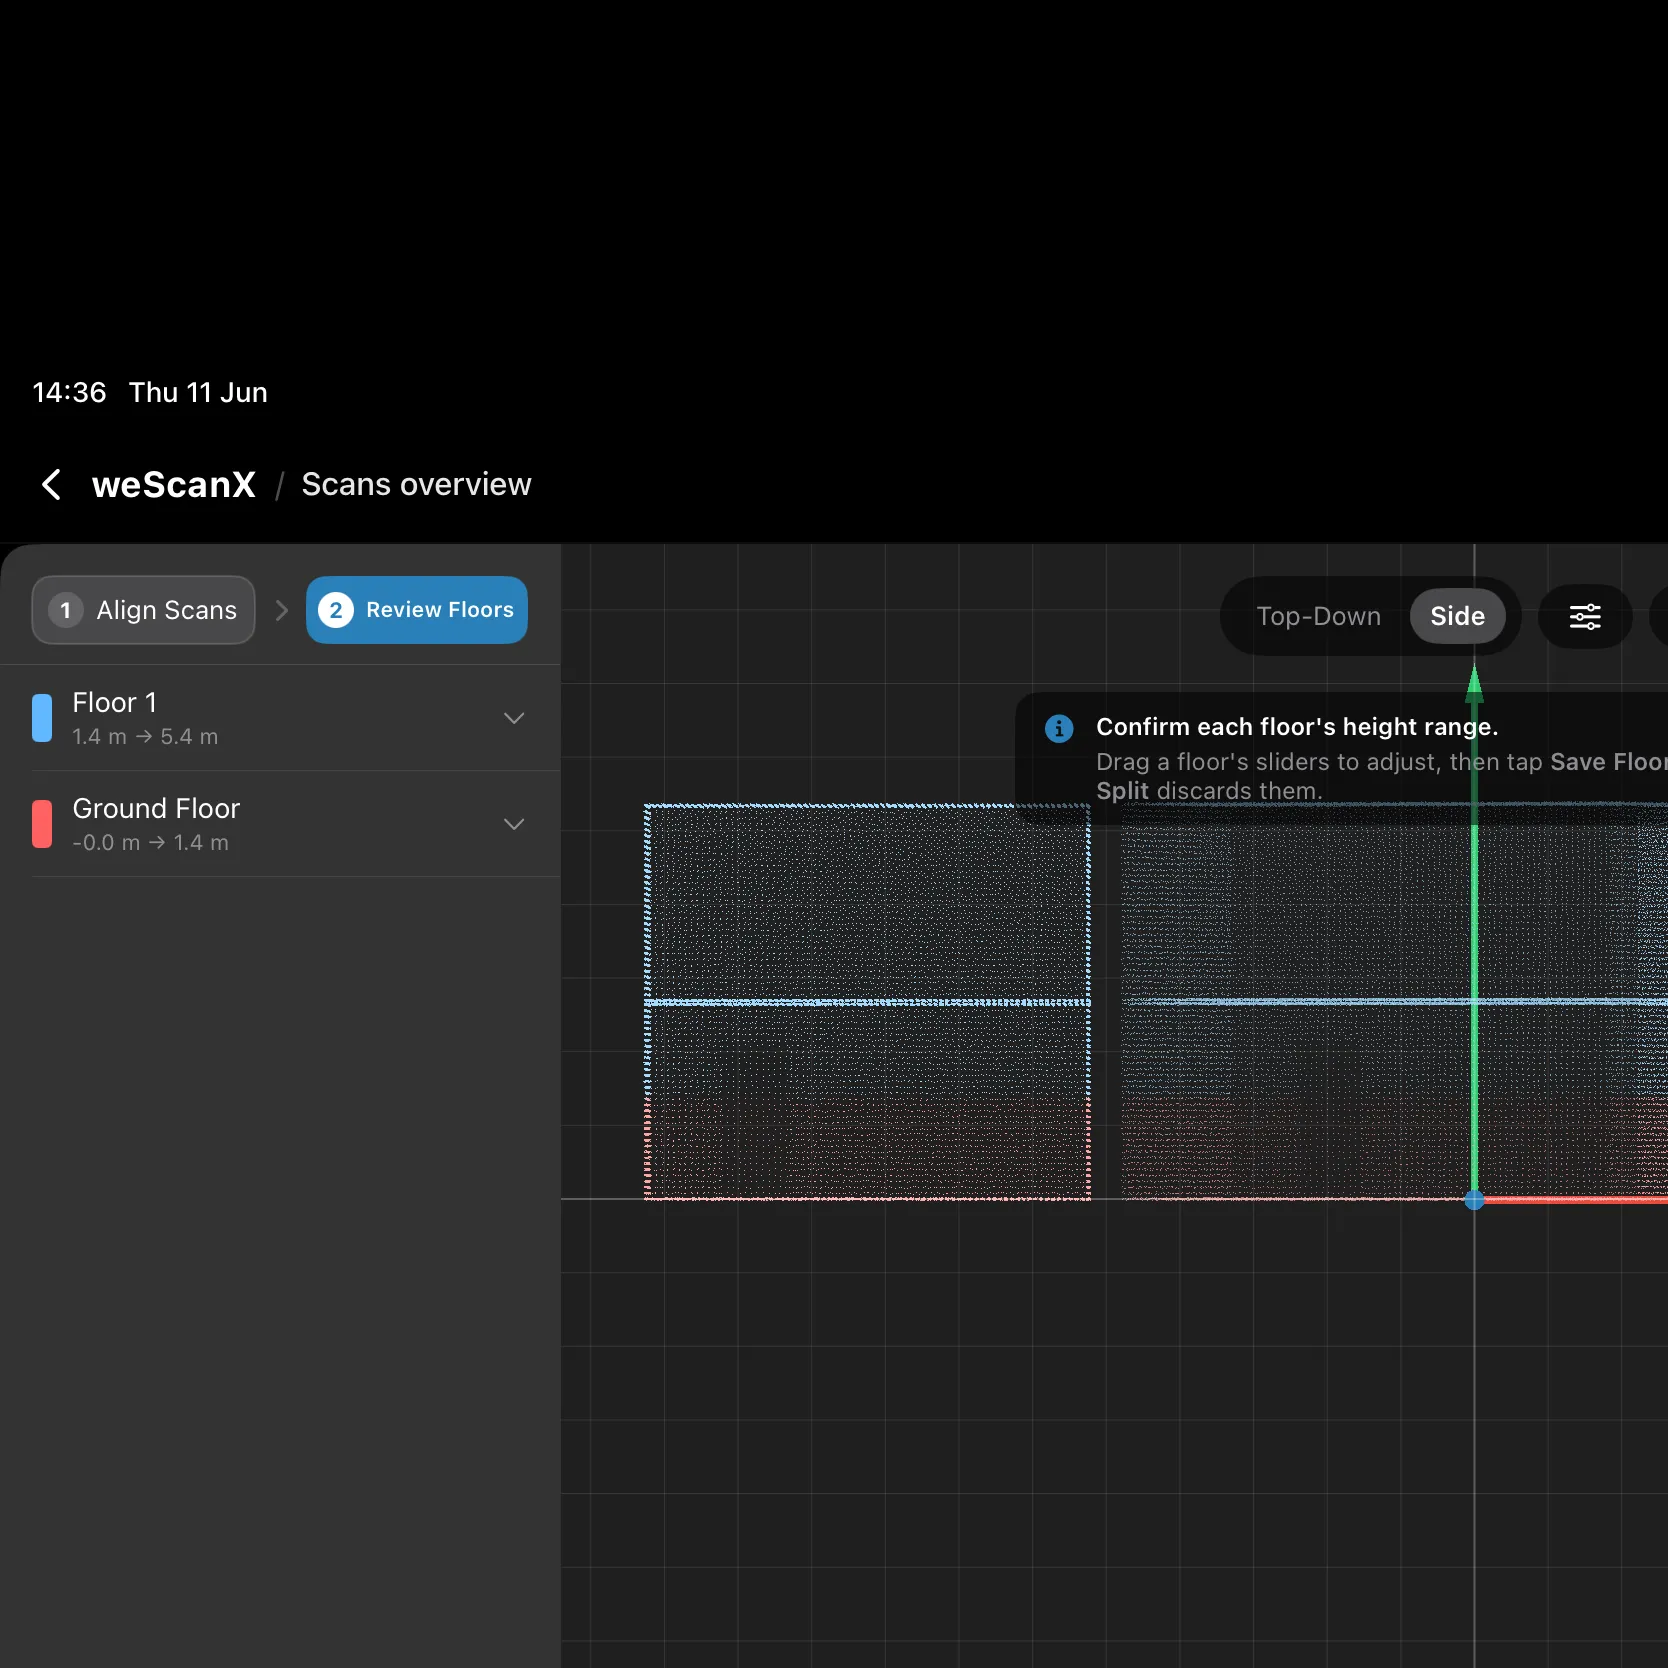
The chip strip below the 3D view switches to floor chips. Tap a chip to expand its bound card and adjust the Upper and Lower values — boundary lines on the 3D view follow along.
-
Check each floor’s range; drag the sliders until the boundary lines sit at the actual floor and ceiling.
-
Tap Save Floors. The floors appear on the project’s Floors tab.
Changing your mind
Section titled “Changing your mind”- Re-Split into Floors runs detection again. The app asks “Replace existing floors?” — the existing floors, their bounds and any notes are discarded before detecting again.
- Remove Floor Split discards the split: “All detected floors and their bounds are discarded and the view returns to the unsplit point cloud. The generated floor point clouds are deleted. Any notes attached to a floor are lost.”