Floor Annotation
After splitting floors, open a floor from the project’s Floors tab and annotate it: control measurements, photos, and the labels for your selected products (Energielabel, WWS, BOG).
Open annotation mode
Section titled “Open annotation mode”-
On the project page, open the Floors tab and tap a floor.
-
Tap the pencil (edit) button, then Annotation.
-
The annotation menu opens on the left with tabs: All, Measurement, EPA, WWS, BOG — which tabs you see depends on the products selected for the project.
-
Use the Top-Down / Side-View pills to change the camera, and Done when you finish annotating.
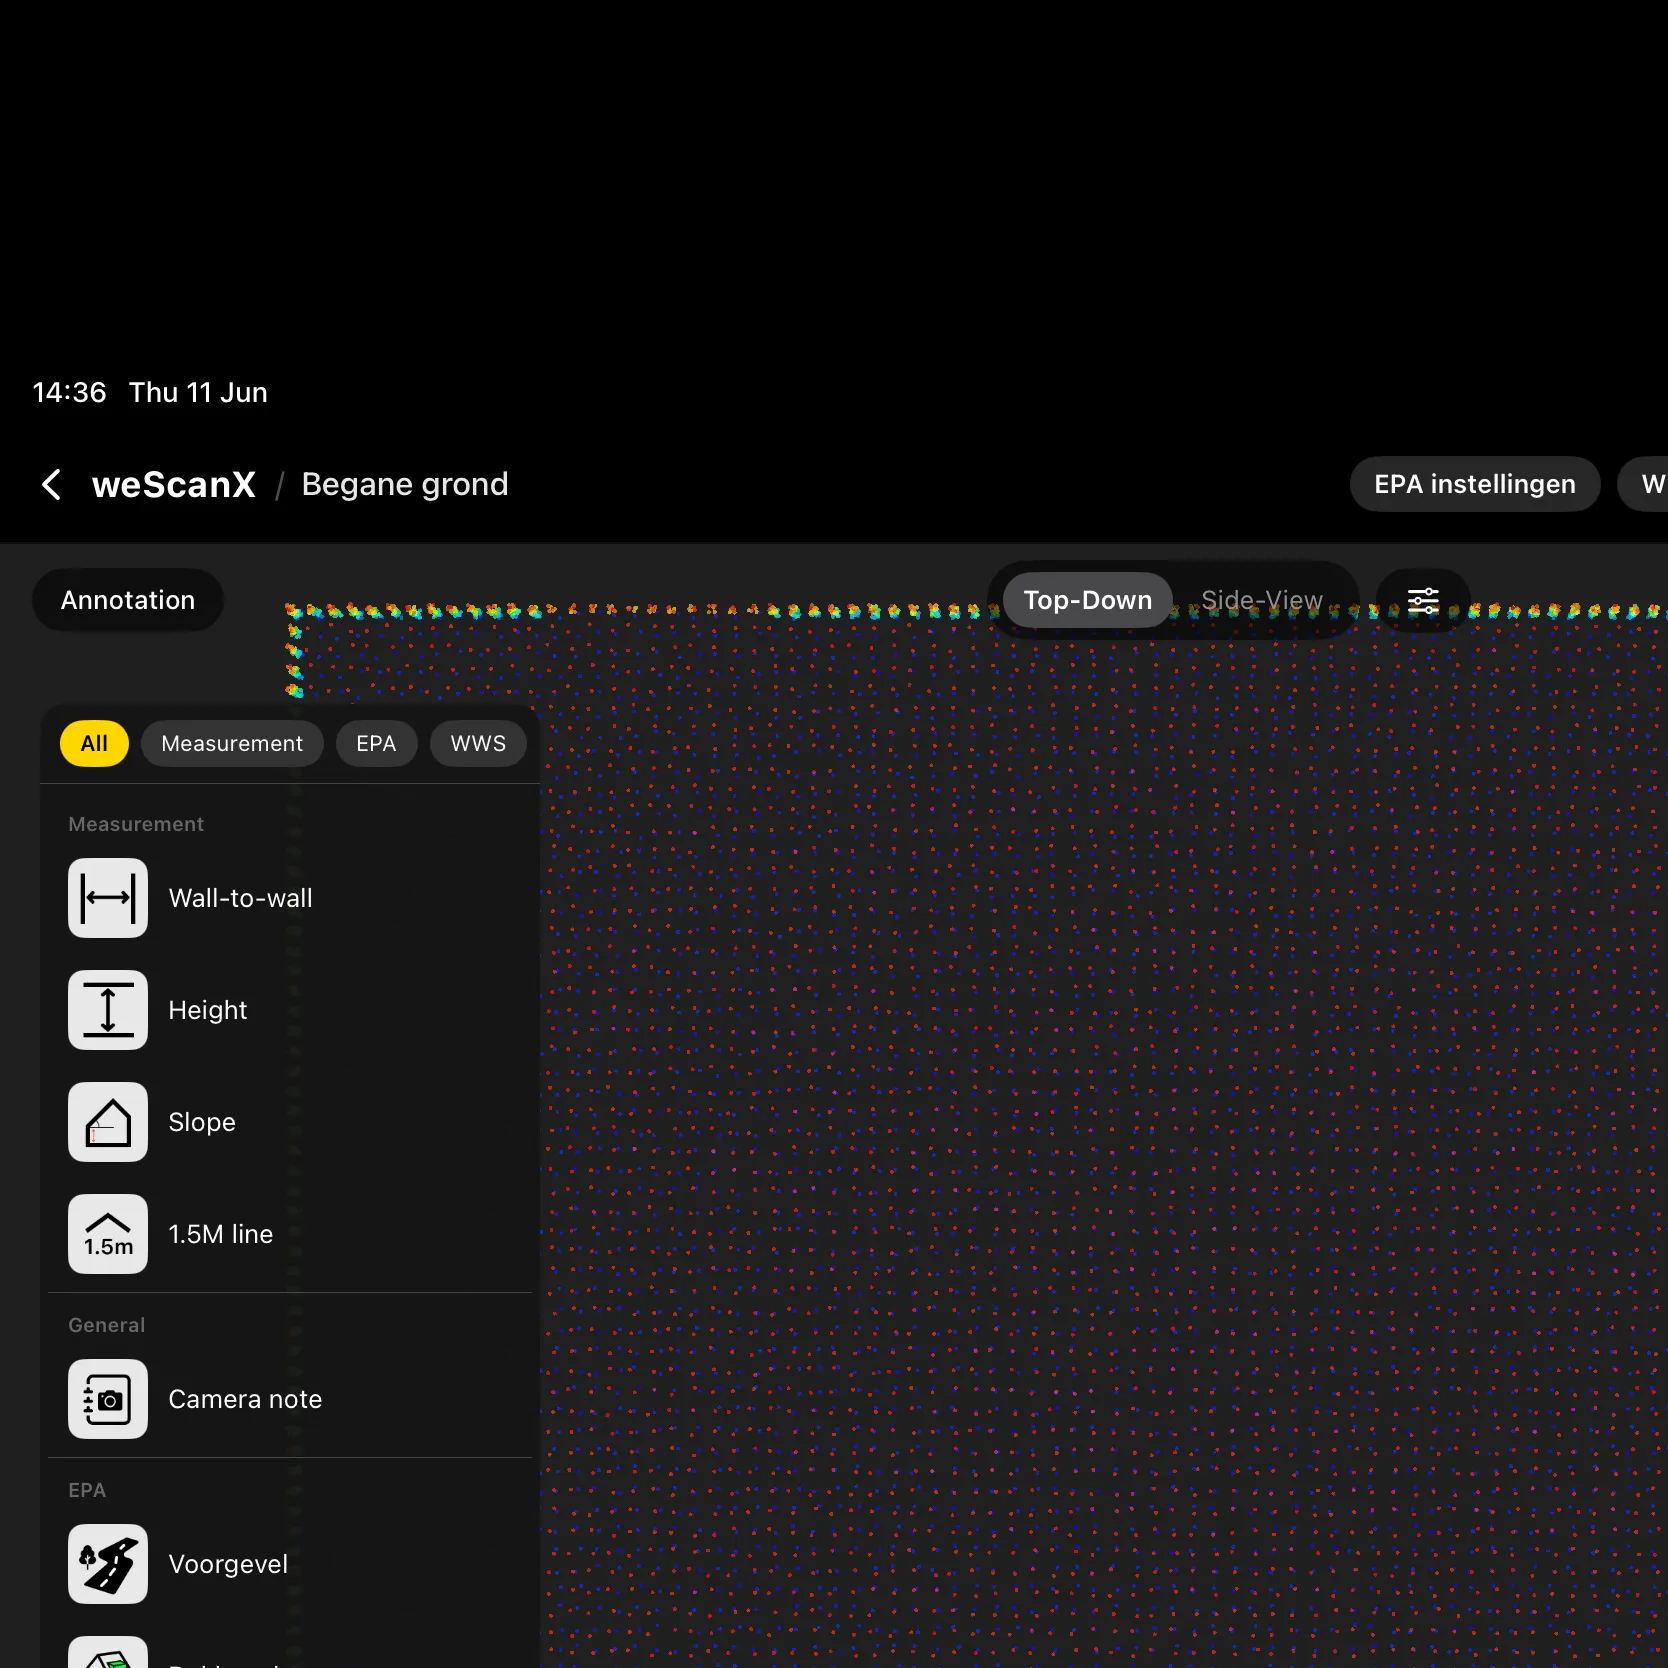
The Annotations panel lists everything you’ve placed on this floor — tap an entry to review, edit, or delete it.
Connect a laser meter (recommended)
Section titled “Connect a laser meter (recommended)”A Bluetooth distance meter makes measuring fast and accurate: the measured value appears in the focused field automatically.
-
Tap the Disto widget in the top bar and choose Bosch or Leica DISTO.
-
If pairing fails, switch Bluetooth off and on, on both devices, and try again.
-
Once connected, the widget shows the last measurement live. Pull the meter’s trigger while a measurement field is focused and the value fills in by itself. Without a meter, every field also accepts manual entry.
Control measurements (Measurement tab)
Section titled “Control measurements (Measurement tab)”Control measurements calibrate the 3D model to real-world dimensions. Aim for 4 to 6 measurements per floor, together covering its full length and width.
- Wall-to-Wall — tap, hold, and drag to draw a line between two straight, parallel walls. Always measure wall to wall, never from a window or an object. For a slanted wall, measure the length of the wall itself instead.
- Height — double-tap where the vertical measurement belongs and enter the value. For roof constructions always enter the ridge (nok) value. Add one per distinct ceiling level on the floor.
- Slope — for pitched roofs: enter the value at the chosen point plus the roof angle. Measure from the same point where you placed a Wall-to-Wall line; a meter with a built-in angle readout helps.
- 1.5M line — the second tool for pitched roofs: draw a line where the room reaches 1.5 m, then measure from that point to the opposite side, so the usable floor area is computed correctly.
To adjust a measurement, select it in the Annotations panel — you can re-measure, move the line, or delete it.
Camera notes and photos
Section titled “Camera notes and photos”- During scanning you captured snapshots with the hold-and-release camera button (see Making a Scan). After the floor split these appear on the floor as markers awaiting classification — open one and choose what it shows (Gevel, Vloer, Dak, Raam, Paneel in kozijn, Deur, or a custom note).
- Afterwards, pick Camera note in the annotation menu and double-tap a spot in the 3D model to attach a photo with text. Use it for hard-to-scan corners, hidden elements (meterkast, cv-ketel), or anything that needs explanation. Multiple photos per note are fine.
- Inside every EPA form a Foto’s section accepts photos via Fotobibliotheek or Camera — use it for evidence shots.
Energielabel (EPA tab)
Section titled “Energielabel (EPA tab)”Shown when the project has the Energielabel product enabled.
The EPA instellingen button in the top bar opens the settings panel with tabs Bouwkundig, Constructies, Installaties, Rekenzones, and Foto’s. Best practice: before annotating, set up standard constructie types (gevels, ramen, deuren with their insulation and glass values) — then labeling snapshots is mostly picking the standard type and only changing what differs.
On the floor, the EPA tab lets you place: Voorgevel (max one per floor), Gevel, Vloer, Dak, Raam, Paneel in kozijn, Deur, Dakkapel, Aanbouw, and Rekenzones (add zones via Nieuw rekenzone toevoegen). For every gevel, also set its aangrenzendheid in the form.
WWS (Huurpunten)
Section titled “WWS (Huurpunten)”Shown when the project has the Point System product enabled. Fill in the project’s WWS info first — WWS instellingen in the top bar opens the Point System (WWS) panel.
-
Open the WWS tab in the annotation menu.
-
Pick the room type — Binnenruimten (Woonkamer, Keuken, Slaapkamer, Badkamer, Toilet, Hal, Zolder, Kelder, Berging, …) or Buitenruimte (Balkon, Dakterras, tuinen, Parkeerruimten, …).
-
Double-tap the room in the 3D model to place the label.
-
Fill in the form that opens — features like verwarmd or gekoeld, extras, and evidence photos. Tap the info icon on a question for guidance.
Rules that prevent rework:
- Label every room, and use exactly one label per room (a bathroom with a toilet is labeled Badkamer only).
- Buitenruimtes: place the point outside the model and enter the surface area manually — it is not computed from the scan.
- Parkeerruimtes must be shared by at least two addresses; a garage belonging to a single address is labeled Garage under Binnenruimten.
BOG (Utiliteitspanden)
Section titled “BOG (Utiliteitspanden)”Shown when the project’s property type is BOG. The BOG tab offers six categories — Werkruimte, Eten & Pauze, Ontvangstruimte, Opslag, Facilitaire ruimten, Anders — each with specific rooms (Kantoor, Vergaderruimte, Parkeerplaats, …). Label rooms the same way as WWS: pick the type, double-tap the room, fill in the form.